For the Love of Red, White, and Blue
A Rug Hooking Exclusive Pattern
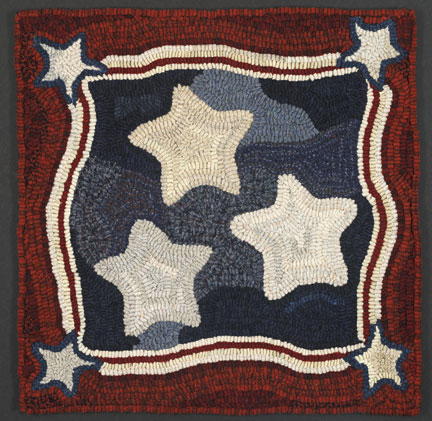
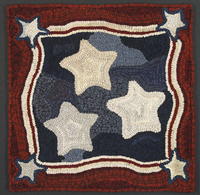
For the Love of Red, White, and Blue, 19" x 19", #8 1/2-cut wool on linen. Designed and hooked by Connie Fletcher/Seven Gables, Norway, Main, 2011.
I live in a quintessential historic New England village, so it's no wonder that I find myself drawn to all things Americana. Every year, I deck my house out in buntings and flags for the Fourth of July holiday and enjoy the summertime festivities. This hooked piece can decorate your home for that patriotic holiday. It is easily and quickly hooked in a #8 1/2 cut.
I hooked For the Love of Red, White, and Blue using a variety of wools in each of those three colors. To get started, pick out four or five wools in each of the colors, cut them in your favorite size, and put all of the worms from each color in big piles. Mixing up your worms like this will help you be more spontaneous as you hook.
Enlarge and Transfer the Pattern
Cut your backing at least 4" larger (on all sides) than your pattern. Prepare your backing by serging or zigzagging around the edges to prevent fraying. The pattern insert is the full finished size of 19 by 19 inches. Place your paper pattern on top of a glass table with a light source underneath. Then place the linen on top of the pattern. Using a fresh permanent marker, draw the outside line of the rug first, making sure to stay on the straight of the grain of your backing. Then add the stars and wavy lines for the flag.
As an alternative, you can take your paper pattern and trace over it with red dot tracer fabric. Once you have your pattern on the red dot, you can then place your linen on a flat surface, put your red dot on top, and draw the pattern on your linen, being careful to keep the outside lines on the straight of the grain.
Hooking
Stars
Outline and fill the three large stars first. Try not to plan the order of the white/cream tones. It's the random use of like tones that creates the interest.
Small Stars
Hook one row of the blue of your choice around the small stars and fill in with creams/whites.
Field
Hook the first white line of the field of the flag. This white line encloses the blue background. (The blue background is known as the "canton" in flag terminology, and the red/white stripes are the "field.") I hooked this first white line with one of the wools in the stars.
Canton
I used four different blues to hook the canton of my flag. Notice that I kept the corners in the darker blue. The rest of the canton is hooked in random shapes using the other 3 blue wools. Have fun hooking the blue background and let the mix of blue wools create a random pattern. It's the movement of the various blue tones that keeps the pattern (and hooking) interesting.
Border
Hook one row of the outside border in the red of your choice. I hooked the entire border out of one red textured wool. I liked how it created a cohesive look that framed my pattern.
Finishing the Field
Be creative here in your use of whites/reds. You decide how many white/red rows you hook and which whites/reds you want to use. After I hooked the first white row of the field, I hooked one red, two white, and then filled in the remaining area with a mix of three red wools. If you prefer, you can add stripes in whatever widths you like. Have fun and hook what looks good to you.
Finishing
Press your rug with a slightly damp cloth and lots of steam. Lay your rug face down on a large towel; lay the damp cloth on top and steam. Don't press down too heavily with your iron. Turn your rug over and see how it looks. You can also lightly steam from the front. Once you are satisfied, lay it on a flat surface to dry.
To keep your edges from unraveling, zigzag or serge about 1" away from your hooked edge. If you zigzagged your backing, cut off the excess foundation next to the stitching. Bind your rug using the technique you prefer. I bound this one using antique black rug binding tape. I sewed the rug tape as close as I could to the last row of hooking. Then I folded it to the backside of the rug and stitched it down by hand, fully enclosing the serged edge under the rug tape. After you have finished binding your rug, you may wish to block it again.
Connie S. Fletcher owns Seven Gables Rug Hooking. She loves old houses, primitive furniture, and Americana. She designs patterns for hooked rugs and teaches rug hooking at Artful Hands Fiber Studio, 316 Main Street, Norway, Maine 04268, (207) 739-2664. Visit her website at www.sevengablesrughooking.com. This pattern is for personal use only, and reselling of the pattern is prohibited.
This article is from the June/July/August 2011 issue. To get this exclusive pattern or for more information on our issue, check out our issues page.
Read NextWestmoreland Ponies