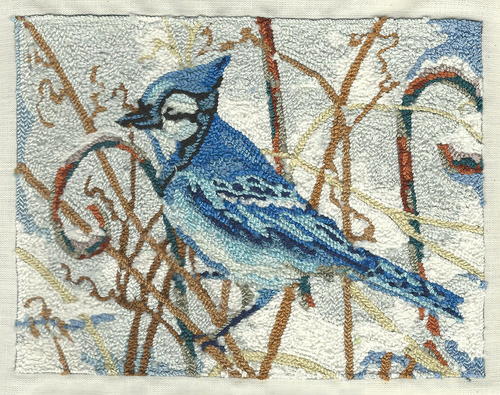
Winter Perch
Punch needle with embroidery floss
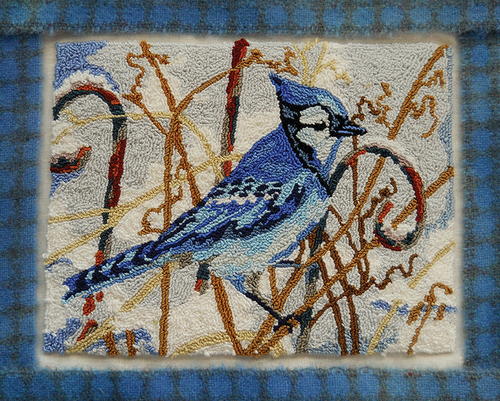
Winter Perch, 7” x 5”, 6-strand DMC floss on weavers cloth, loop length on shortest setting. Designed and punched by Michelle L. Palmer, Palmyra, New York, 2018.
How does an artist, who has passionately worked with ink and watercolor for 30 years, develop a fascination for fibers? They have potential. Fibers have the ability to bring ideas and sketches to functional products. Wool and cotton do not stay tucked in a book nor are they required to be protected behind glass. Fiber pieces are tangible works of art.
For many years, I illustrated and painted from dawn until dinner. I was content working late nights and weekends to meet art deadlines and build my licensing portfolio. Being self-employed allowed me the flexibility to work around our family schedules and tuck in extra studio time whenever possible. Fourteen years ago I had a hankering to make one of my children’s book characters three dimensional. I wanted to take my work to the next level and place the felted character in our child’s hands. Little Owl needed to be plush, soft, and cuddly—without sewing. I discovered needle felting with wool roving, and so began my love of fibers. I accomplished something with roving that I could not capture in my sketches or watercolor. My needle-felted owl was formed without a full-color illustration. I painted him with every poke of the barbed needle, shaping him with colorful wool fibers. Little Owl developed a presence and personality that brought him to life and helped me finish my book.
Roving supplies were limited when I first began felting. I purchased carded wool from local sheep farmers and began building my palette by dyeing at home when time allowed. My husband searched out a local fiber festival. When we walked through the festival gates, a whole new world opened up to me! Hooked rugs were displayed everywhere! We gathered plenty of roving, but I had an even stronger pull toward the rugs. How do they do that? I want to do that! I was drawn to fibers through the talent and vision of other craftsmen. The festivals became a rich resource for gathering textures, plaids, overdyed wools and mottled wools in an endless array of colors. After a few years of gathering wool, I was ready to begin my first hooked rug! I called ahead to the stitchery shop with a few questions, and the owner invited me down. The store was brimming with inspiration! I spotted a small punch needle piece, and it was love at first sight: a masterpiece. The punch needle work reminded me of a mini hooked rug or even a small textured painting. The owner and I talked punch needle for over an hour. Her knowledge and enthusiasm expanded my interest. I walked out of her shop with punch needle supplies and a little hop in my step.
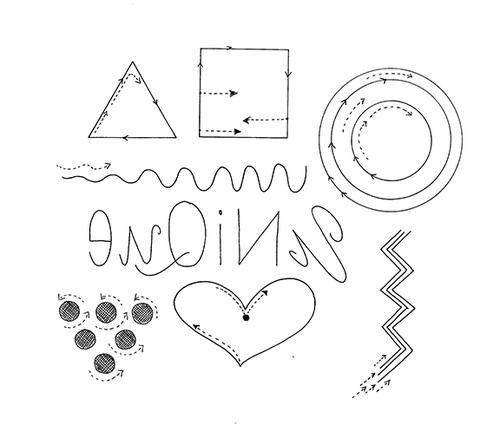
With my weavers cloth drum tight in my locking hoop, I sketched a small triangle, circle, square, and a word. Using three strands of floss in my tool, I began experimenting with how close I could place the stitches without pushing set stitches out. Within a few hours I was confident enough to try something with a little more detail. I took inventory of my floss colors and sketched a simple flower. I knew shading effects and intricate details would come with time. My goal was to find a hobby that I could relax with. It was important for the punch needle tool to feel just as familiar in my hand as my paint brush. It took several pieces before I started to develop my own style of punching.
I miss the character and imperfections of my early work. Once you become proficient in any art medium, it is like an old friend. You pick up where you left off as if no time has passed. There is excitement in learning a new hobby, but there is comfort in relaxing with the familiar.
I’ve been painting with threads and fibers for eight years now. At the end of the day, when I finish with work and pick up my punch needle, I change palettes, but I don’t stop “painting.” My watercolor palette is very fluid; the colors vary from painting to painting and are limitless. Painting with fibers takes more planning.
There are several brands of threads available, but colors are limited unless you dye your own. DMC floss colors are similar to those on my watercolor palette, so they are suitable for my work. When I’m developing a new design, I gather my complete floss palette in natural light, preferably early morning. If the sun is too high it casts a warm glow. For muted or primitive colors, I use Instant Antique by Primitive Gatherings. The stain is fiber safe and comes in a convenient spray bottle. Lightly spritz the floss skein prior to punching and allow it to air dry completely. Once I have my floss selected, I trust my color choices regardless of how they appear in different lighting. This allows me to complete my projects at any time of day in any type of lighting.
Regardless of which tool I use to render art, every single design begins with an idea and a series of quick sketches on paper. The more I sketch, the better my composition. It isn’t finished art, it is a starting point. When I am happy with a sketch, I darken in my lines and enlarge it to the size I want to punch.
If you prefer to work from one of your own photographs, you can hold the image up to a window, tracing the main shapes and larger details on a clean piece of paper. Photographs are nice because they aid in color planning.
Take inspiration from what you know. If you drive country roads, perhaps that old red barn in the middle of the golden wheat field would be a great first subject. Maybe your office window overlooks a painted city bench that pigeons perch on in the morning sun. It is easier to design when we are familiar with a subject.
Patterns designed by others can also be an exciting way to begin. Every designer is different; please review and respect their personal copyright guidelines. I love when my customers color outside the lines. All of my patterns come with a black-and-white line drawing to print and trace, and a scan of the backside of my finished punch needle piece to aid in color placement. The floss colors that I list are only a suggestion. Punch needle allows us the freedom to be painterly.
Most importantly, sketch what you love. What surrounds you? Do you collect old crocks, quilts, or birdhouses? Snap a photograph while strolling through a garden, hiking, or boating. My portfolio tells a story about my interests, my heart. My best work always develops from subjects I know the most about and love.
Beginning Punch Needle Exercise Pattern
-
Try punching these or similar designs to learn how a punch needle works. I recommend three strands of floss when starting out. Arrows provide suggestions for punching direction. The word UNIQUE is written in reverse so that it will read correctly when finished. When punching your word, strive to set your stitches as close together as possible without pushing out the previous stitch to help shape each letter. The stitches surrounding your finished word do not have to be as close. Change colors for each section of the circle. Squiggly lines and zigzags provide more opportunity to get to know your tool and how curves and angles behave. Polka dots are a fun way to practice repeats and filling the area surrounding them.
-
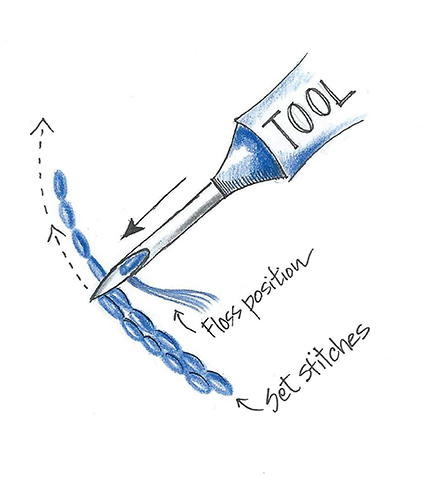
I punch with the wedge of my needle facing away from the set stitches to prevent stitches from mixing together, providing a crisp line. If your stitches mix, you can turn your piece over to the finished side and with the point of your tool or scissors, gently guide the wandering floss loops where they belong.
More Images
-
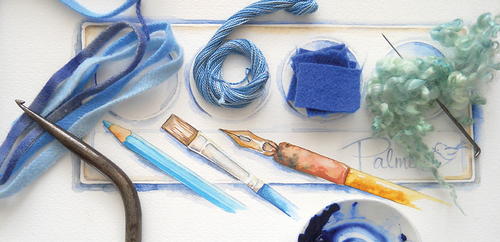
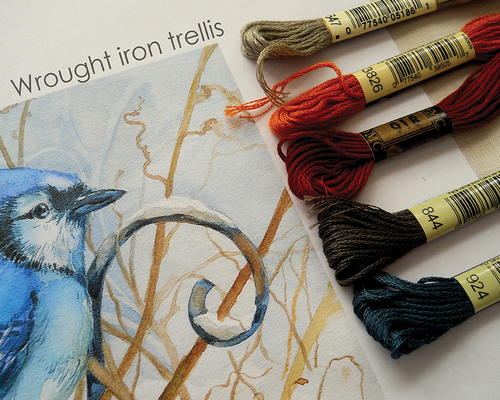
A painter’s palette enriched with fiber
-
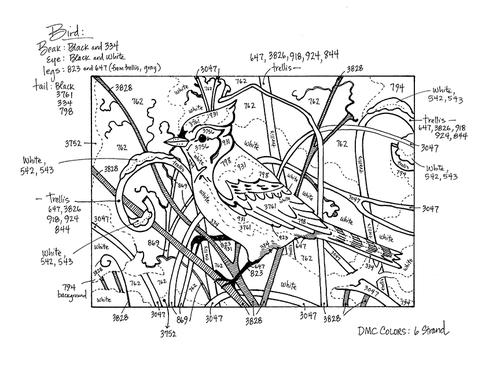
Schematic for color placement.
-
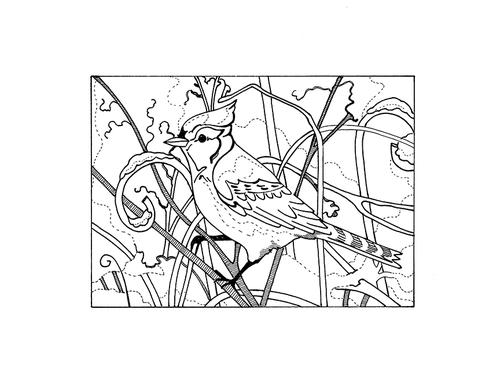
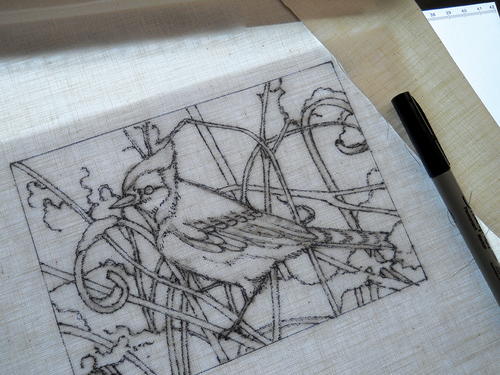
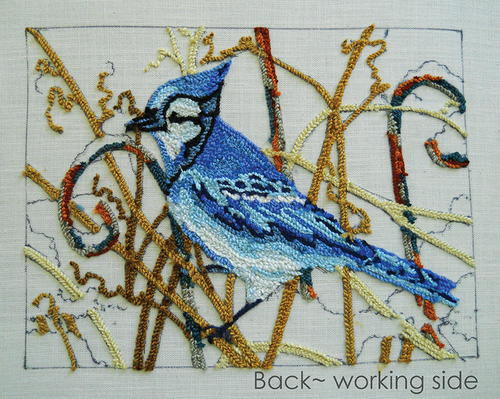
Winter Perch © Michelle L. Palmer, 2018. Trace on weavers cloth in order to punch with embroidery floss.
-
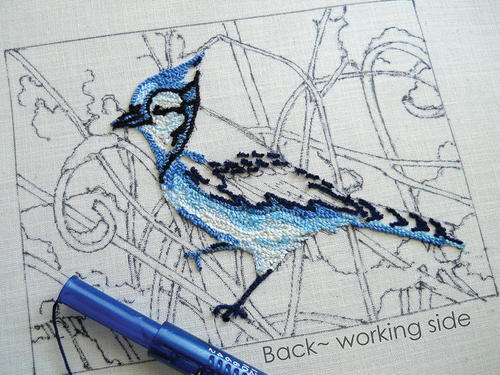
This is a scan of the back side of my finished punch needle work. Use this to aid in color placement.
-
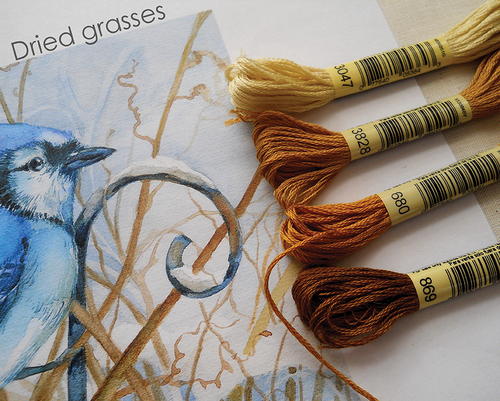
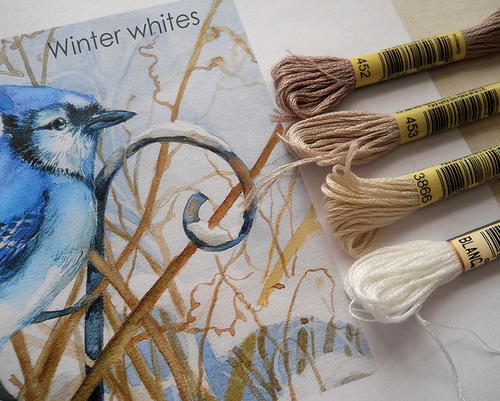
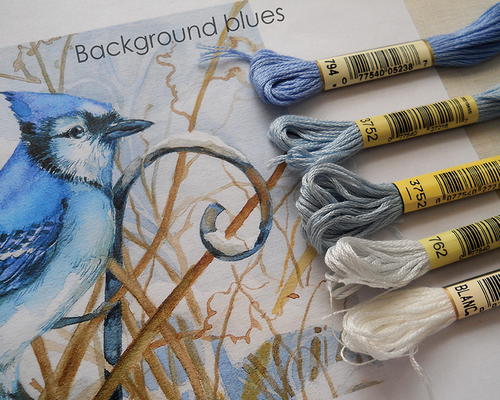
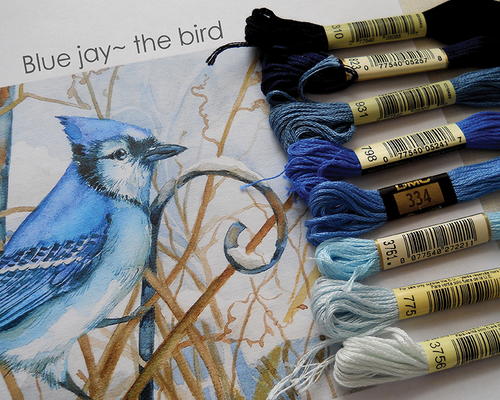
The Floss Collections
-
Picking out my palette. I have large bins of floss organized by color families. My painting is primarily blues, yellow, gold, and winter whites, so those are the bins I am focused on.
-
Tracing the design, in reverse, on my light pad.
-
I punch the main subject first, getting those feathers painted. Fine lines and small details first, filling in around them. Once I get the bird the way I like it, everything else will fall into place. This picture is of the back, the working side.
-
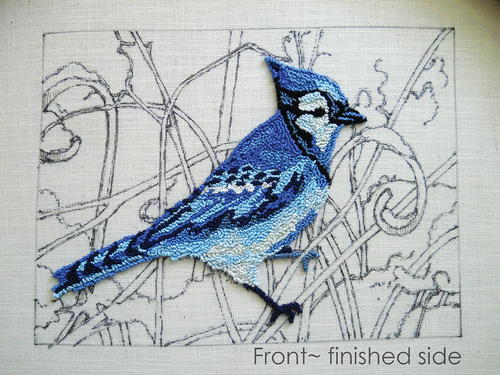
Our finished bird, the finished side! Now I will move on to the grasses and wrought iron trellis.
-
I use a Dritz brand locking hoop to keep my weavers cloth drum tight.
-
Punch the remainder of the small details, then begin filling in the snowy shadows and background.


About the Author:
Michelle Palmer lives in the Finger Lakes Region of New York. Painter, designer, teacher, and licensing artist, her illustrations are licensed to fabric, calendars, garden flags, greeting cards, and other home décor collections. Michelle’s love for fibers first began with needle felting. In 2010 she began translating her paintings and illustrations to punch needle designs. In 2017 rug hooking was added to her list of artistic adventures! https://www.etsy.com/people/MichellePalmer http://michellepalmerart.blogspot.com/
Read NextHooking with Silk? Why Not?