
Bittersweet Stocking
A Rug Punch Project from Notforgotten Farm
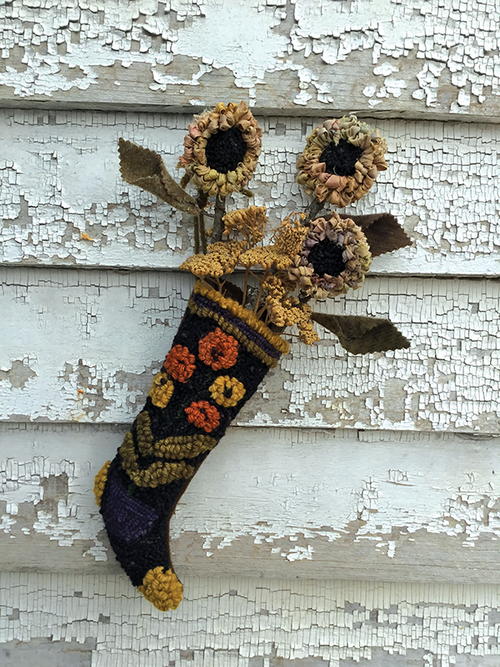
Bittersweet Stocking, approx. 11” long. Punched with yarn. Designed and hooked by Lori Brechlin at Notforgotten Farm, Amherst, Virginia, 2019.
I love all things autumn and Hallowe’en. I start decorating in late August, early September! There is something magical about the changing colors of our beloved farm surroundings. Our woods and fields come alive with newfound exuberance—late-summer yellows fade to rusts, while once-bright purple flowers take on a mellow note. Colors nod toward the jewel-tones of red sumac and ripening bittersweet vines.
And so it goes with my designing and needlework. I will absorb those colors and be inspired by my surroundings to hook, punch, and stitch as the wheel of the year turns to the colder months once again.
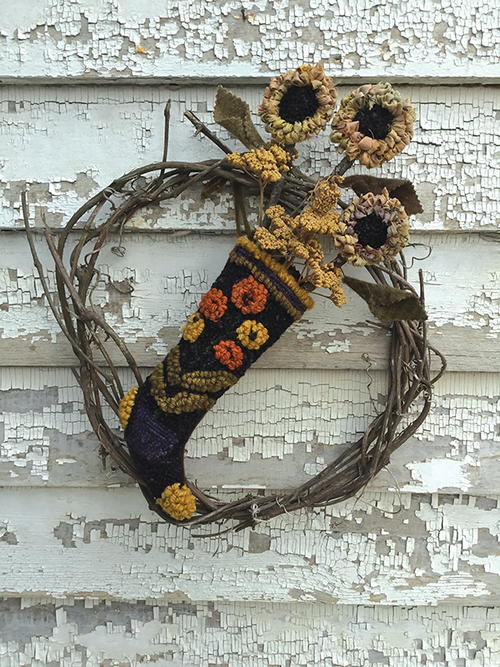
I have one grapevine wreath that I keep out all year through; it hangs on the side of my old farmhouse and I decorate it for the seasons. Wanting something a bit different for this autumn, I was inspired to make this small bittersweet stocking to hang on the wreath.
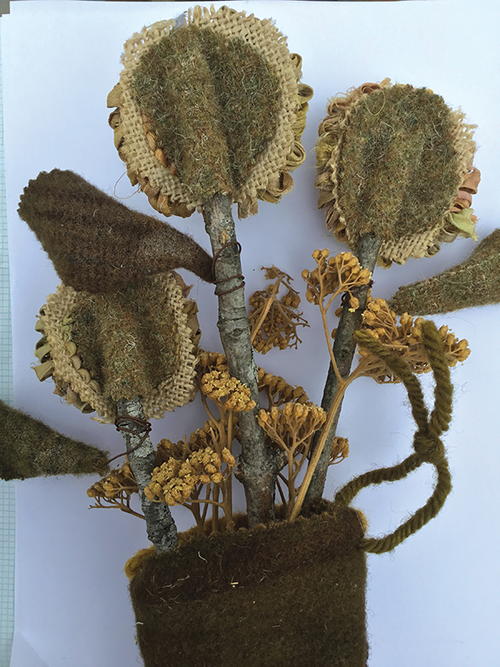
I also made a few flowers to tuck inside my stocking for a bit of whimsy.
Hook this design, or punch it. Nothing makes me happier than sharing my love of wool, so I am thrilled to share this bit of my heart-work with you!
You will be using two different-size Oxford Punch needles, to give a dimensional effect to your stocking.
Or use only the #10 and use 1⁄4" wool strips of wool instead.
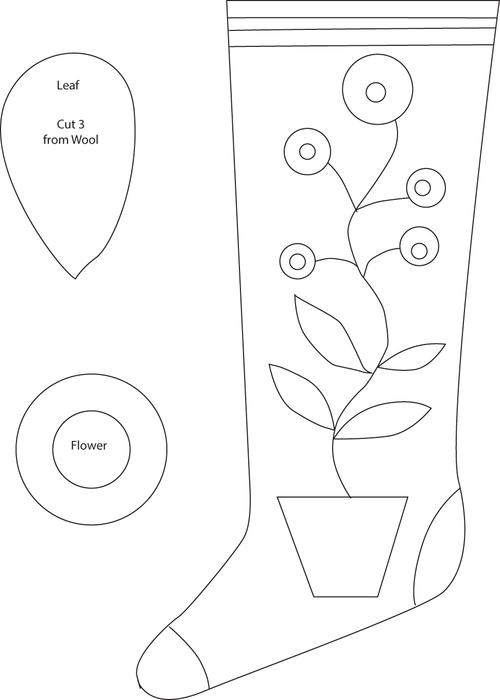
Transfer the stocking template and three flower templates to your rug backing, using the black marker.
Punching instructions:
1. Using the Oxford #14 Punch Needle and the Deep in the Pines yarn, punch the stem as shown on the pattern template.
2. Using the same #14 needle, punch the pot with Boo Berry yarn, then punch the center stripe at the very top of your rug pattern.
3. Now use the Oxford #10 punch needle and the Army wool to punch the leaves and bottom stripe at the top of your stocking.
4. Using the #10 needle, punch the top flower and two alternate flowers with the Cinnamon yarn.
5. With the #10 needle, punch the remaining two alternate flowers, the top stripe, and the toe and the heel of your stocking.
6. Switching back to the #14 needle, use the Midnight Black yarn to fill in the entire background of the stocking. Then punch the centers of the three separate flowers. Use the large eye or yarn needle to add French knots to the small flowers that you punched on the stocking itself.
7. With the #10 needle and the sari silk ribbon, punch the outer portions of the three separate flowers.
When the punching is finished:
Trim your stocking backing to within 1⁄2" of the last punched row except along the very top. At the top, leave at least 3” of rug backing to turn down once project is sewn.
Now, cut out the three punched flowers from the rug backing using pinking shears; cut 1⁄4" away from the last punched row.
Finish the stocking:
1. Lay your wool backing down on your work surface, then lay the punched stocking face down on top of the wool. You may wish to pin these together. Machine or hand sew down the sides and across the bottom, heel, and toe of your stocking. Leave the very top of stocking open.
2. Trim away excess wool backing and rug backing to within 1⁄4" on sides and bottom of stocking.
3. Turn your project right sides out. Tuck the remaining rug backing down into the stocking; the wool backing should be trimmed to the same opening height.
4. Add a loop of some sort to hang your stocking. On the template, the “X” marks where you might stitch a loop of yarn through the stocking to use as a hanger.
Finishing the flowers and leaves:
Using the paper template of the flower and the leaf template, cut out three pieces of wool from the various green wools you will use for the leaves. Use your pinking shears to cut the flower backings and the wool leaves. Apply white glue to the back of each flower, one at a time as you work; place one end of a stick/branch/dowel onto the glue, then place the pinked wool circle on top of that. Use your fingers to smoosh down the wool over the stick. Let dry.
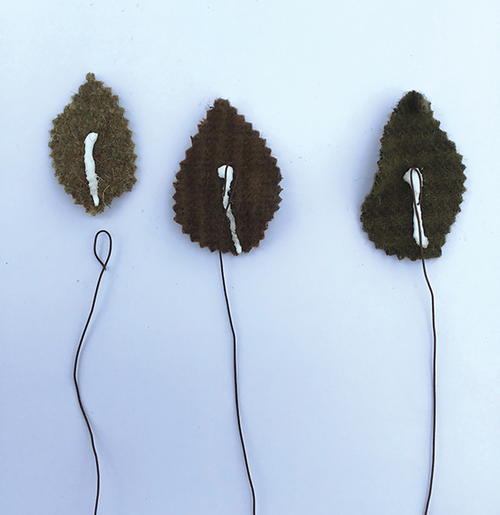
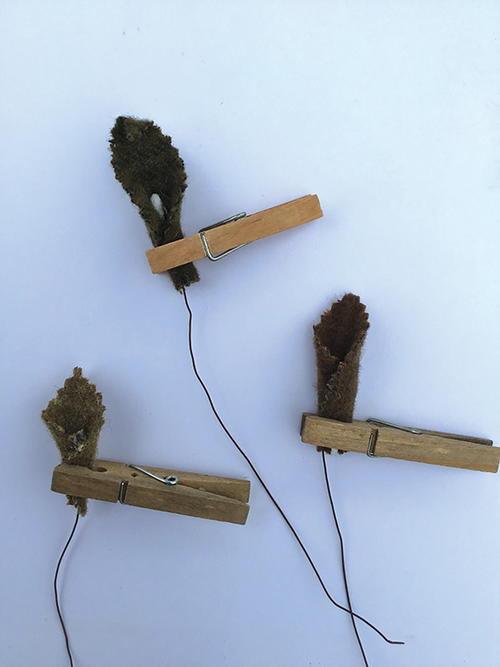
Leaves:
Lay each leaf on your work surface. Use your pliers to make a small loop on one end of each piece of wire. Apply white glue to the non-point end of leaf, making a line of glue half-way to the leaf point. Set the loop end of the wire down into the glue, and with your fingers, smoosh the wool to make sure it sticks to the wire. Repeat for each leaf and let them dry. I use a clothespin to hold the wool in place as it dries.
Once dry, wrap the free end of the wire onto the stem of each flower, then tuck each flower down into your stocking. For a special touch, I added some dried yarrow from our gardens.
Materials:
-
• 1⁄4 yard rug backing, linen preferred
• Oxford Punch Needles—size #10 and size #14
• Lightweight wool yarn in dark green, black & purple. Sample is made with Whackadoo Rug Yarn, from Colleen Solmos Faulkner (Boo Berry, Midnight Black, and Deep in the Pines)
• Heavy-weight wool yarn in green, orange & yellow. Sample is made with Ali Strebel Rug Yarn: www.alistrebeldesigns.com (Goldenrod, Army, and Cinnamon)
• 1 yard sari silk ribbon, gold
• 1⁄4 yard brown wool for backing
• Scraps of 3 different greenish/brown wools for leaves
• 3 pieces rusty wire, each about 7" long
• Black marker
• White glue
• Sharp scissors
• Pinking shears
• Large eye needle or yarn needle
• Small pliers
• Sticks, branches, or 1⁄4" dowels
Images:
-
With wreath.
-
Back.
-
Leaves
-
Leaves
-
Bittersweet Stocking, approx. 11” long. Punched with yarn. Designed and hooked by Lori Brechlin at Notforgotten Farm, Amherst, Virginia, 2019.
About the Author:
Lori Brechlin loves working with natural materials such as cotton, linen, and wool. Her work is inspired by her Pennsylvania German heritage. She grew up along the Connecticut shoreline and now lives in an old farmhouse in Virginia. Visit Lori at her Notforgotten Farm, follow her on her blog (www.farmhousenotforgotten.blogspot.com), and purchase supplies and patterns at www.etsy.com/shop/notforgottenfarm.
Read NextHow to Photograph Your Rugs: Part 1

