An Intro to Rug Hooking for Beginners

Ready to dive into the world of rug hooking but aren't sure where to start? This simple beginner's guide is just what you need to learn how to hook rugs. Donna Hrkman will show you how to gather supplies, make those first loops, and avoid common beginner mistakes. Plus, don't miss the collection of video tutorials from Gene Shepherd, which will guide you through other basics like cutting wool for rug hooking and choosing a hook.
The following is excerpted from Rug Hooker's Companion by Donna Hrkman
Setting up
First, collect your tools. You will need a frame, a hook, a pair of scissors, a pattern drawn on backing material, and stripped wool. Scroll down to see visuals of these materials, and click this link to see a video from Gene Shephard about choosing the right hook.
Make sure you have a comfy seat and good lighting. Squinting and straining over your frame will take a toll on your eyes and your back.
Stretch your pattern material on the frame, centering it over the open area. Make sure it’s as snug and as even as possible, lining up the weave of the backing material with the sides of the frame. Some rug hookers leave some slack in the fabric, but to get the most even, consistent loops pulled, a taut and square surface is best.
The first loops
Take your first strip of wool in the hand you don’t write with and hold it under the surface of the backing. Hold the strip between your thumb and index finger like you’re pinching it. Holding your hook in the hand you write with, gently push the hook into a hole in the backing just inside the drawn line of the pattern. Feed the end of the wool strip to the end of the hook, catch it, and pull it through the hole so the tail of the strip pops up through the surface, leaving about a quarter inch of the end sticking up.
Push the hook down through the hole next to the tail you’ve just pulled up, feed the strip to the hook with your fingers underneath the backing, and catch it with the hook, pulling up a loop that forms about one quarter inch above the surface. Release the loop off the hook, put the hook into the next hole and repeat, pulling up another loop next to the first one, keeping the loops the same height.
Skip the next hole and pull a loop into the one after that. If you hook every single hole, the wool will be too tightly crammed into the surface, which is called “packing.” The surface of the rug will be drawn up by the tension of the loops and will not lie flat. Hooking too tightly also wastes wool because you use more than you need. Wool needs air to expand and contract naturally, so remember to space your loops evenly. You will develop a pattern of hooking—hole-hole-skip, hole-hole-skip. With practice, the wool will tell you where it needs to go.
At the end of your strip, pull the last bit of the tail to the surface. You should have a line of wool loops that runs evenly across the surface. From the side, the row should look like ribbon candy (see images below).
To continue, take your next strip of wool, hold it under the surface next to the tail you just pulled up, and put the hook into the same hole you just pulled the tail through. Pull up the end of the new strip flat against the tail of the first strip, release it, then push the hook into the hole next to the two tails that are sticking up together and pull up a loop level to those in the first strip. Release the strip, reach and pull a loop in the hole next to it, release, skip a hole, and pull up a loop in the next hole. Continue to create hooked lines to form an outline of the area you’re filling up, pulling up tails as you go. The loops should stand like a row of soldiers, shoulder to shoulder. They should not be zigzagging like a zipper or rolling up and down like a roller coaster. You can adjust the height of the loops by gently tugging the loops with the hook to even them out.
Keep going!
To start a second row next to the first row, leave a row of backing open and push your hook through the backing into a hole one row over. If you’re carrying over from a previous row, you’ll continue hooking right to left and left to right, back and forth, with an empty row between the lines of hooked wool strips. The backing will be able to expand and contract, to “breathe.”
Your tails will be sticking up slightly higher than the surface of the rug loops. Some hookers leave the tails standing without trimming them as they work across the surface; I trim them as I go, or in brief intervals of hooking. To trim a tail, tug it gently up, trim it across evenly, and release it. Don’t cut at an angle. The slight tension and release will let the tail pull itself back just under the surface of the loops beside it, hiding it from view. The tails of your strips should not be higher than your loops.
Some basic tips and general rug hooking instructions
Hook the outline of each area first and then fill it in. Hook just inside of the line, as hooking on the line or outside of it will distort the image. This is important on rugs with a geometric pattern or in rugs with fine detail. .
When hooking circles, start with a series of loops in the center and hook concentric rows outward. Make sure to keep the rows evenly spaced because the backing can draw up and form a dome if a circle is hooked too tightly. Want a demonstration? Watch this video for a tutorial from Gene.
Beginners often struggle with twisted strips as they learn how to manipulate them under the surface. After all, you’re doing this blind and relying on the feel of the strip. The twisting can happen sometimes because the strips are thin or the texture of the wool is loose and your fingers can’t feed it smoothly without having it twist. Usually this twisting goes away as you develop a sensitivity to how the strips feel in your fingers.
Sometimes a strip pulls apart and breaks. If this happens, pull the last end up to the surface, trim it off evenly, discard the broken strip, and start a new strip in the same hole as the broken one and continue hooking.
You’ll be amazed how quickly you develop a feel for the wool strips and the process of pulling loops. You’ll get into a rhythm of pulling up the loops and working across the surface of your rug and then you’ll relax and enjoy the whole art of rug hooking.
Remember, practice really does make perfect when it comes to rug hooking. Draw some straight lines, some circles, some curvy and wavy lines and practice hooking them until you feel comfortable with the consistency of your loops and rows. And don’t be too strict with yourself as you’re learning how to start rug hooking. Give yourself time, have fun, and create something beautiful!
Rug Hooking Video Tutorials
How to Pick a Hook
How to Cut Wool Strips
How to Hook a Circle
Getting the Most from Your Stash with a One Pot Wonder
Marrying Stash Wool Without Dye
Traditional Proddy Mats
Essential materials
Please click on the image to enlarge.
-
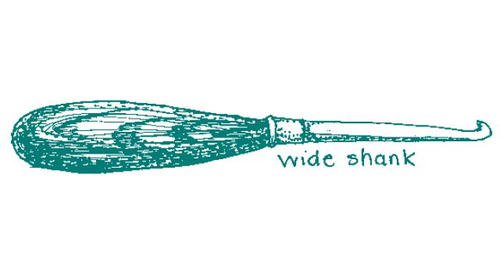
Wide shank hook
-
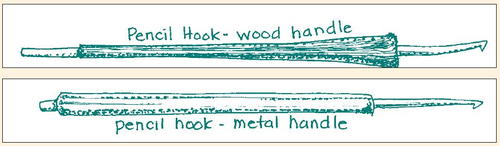
Pencil hooks
-
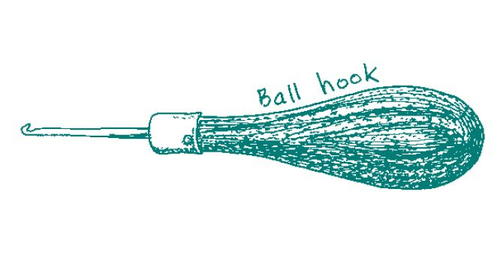
Ball hook
-
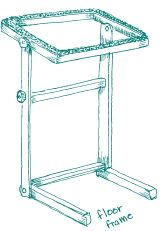
Floor frame
-
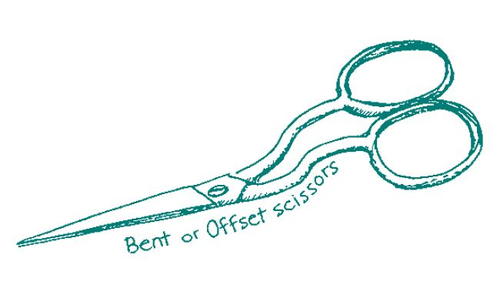
Bent or offset scissors
Rug in progress
-
Ribbon candy
-
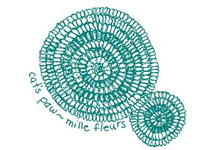
Cat's paw - mille fleurs

Read NextCelebration 33 Call for Entries