Rug Hooking Pattern: The Never Trivial Trivet

We all begin somewhere, pulling those first loops. Some of us are further along than others in our rug hooking journey, but everyone can identify with that feeling of newness somewhere along the way. I began with a one-day class and then worked on my own for two years, learning by my many mistakes and lack of a teacher. I finally found a wonderful guild and mentor and was on my way to refining my art. This acorn mat is a culmination of the rug hooking skills I learned along the way.
Rug Hooking Quick Tip: How to Make Wool Strips from Recycled Clothes
Rug hookers often work with “found” wool from recycled clothing. The following instructions tell you how to prepare and dye wool from a skirt found in a thrift shop.
Deconstruction and Preparation
For this Acorn Trivet, we will work with a recycled, 100% wool, textured skirt, size 10, no pleats (too bad—pleats add more wool!). I removed the waistband, the lining, and the pockets, then I opened up all the darts and the hem. This one skirt gave about 3/4 yard of wool. Then I soaked the skirt in warm water with a few drops of Synthrapol, a wetting agent, for one hour. The wetting agent opens the cuticle of the wool so it dyes evenly and doesn’t have a white core. (This is true for solid wools but not so much for the texture wool we are using.)
Dyeing
Crock pot dyeing is easy, very forgiving, and requires minimal equipment. Fill a for-dyeing-only crock pot half full of warm water and prepare your dyes. Mix dry dye with boiling water, and stir to mix with a small whisk.
The skirt was dyed with PRO Chem dyes #560 chestnut, 1/8 tsp. over one half of the skirt. The other half was dyed with 1/8 tsp. PRO Chem #729 evergreen.
Turn the lid of the crock pot upside down. Place your wet wool to be dyed in the reversed lid, scrunched and crumpled as evenly as possible. This will keep the wool warm and easy to reach when you’re ready to submerge it in the pot. Add the mixed dye to the crock pot and stir. Now grab the scrunched wool and gently drop it into the water; push the wool down one time. Place the lid back on and walk away. Yes, set it and forget it. After 30 minutes, add 1 tsp. citric acid. Push the wool to one side while adding the citric acid so you don’t pour it directly onto the wool. Replace the lid and simmer the wool for another 15 to 20 minutes until the water clears. Then remove the wool and allow it to cool, rinse it well, and let it dry.
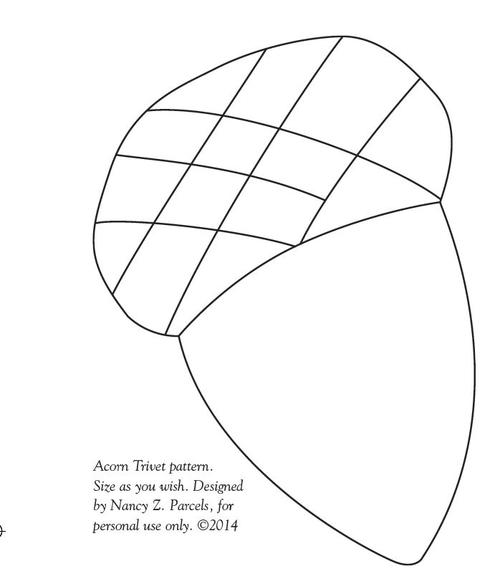
Acorn Trivet Pattern Instructions
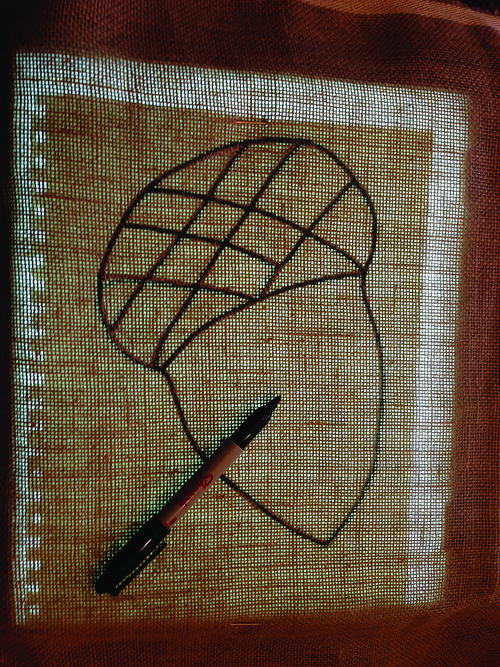
Prepping the Backing
Transfer the acorn pattern to a foundation of your choice. Add 4" on each side of your pattern to allow enough room for the grippers on your frame to grip it and enough foundation for you to whip it. Use duck tape (not duct tape) available in fun prints and colors to keep your foundation edges from unraveling. Gone are the days of zigzagging or serging edges. This modern new method works fine for me. Lay a length of tape the length of your foundation, sticky side up, then line up and ever-so-gently stretch and straighten the foundation. Lay the foundation evenly and gently on the tape. The linen should cover one half of the width of the tape. Fold the remainder of tape forward and gently press to stick it to the front of the foundation. Now you have sound and sealed edges.
-
Position the pattern with 4" of extra backing around the edges. Transfer the pattern to the backing.
-
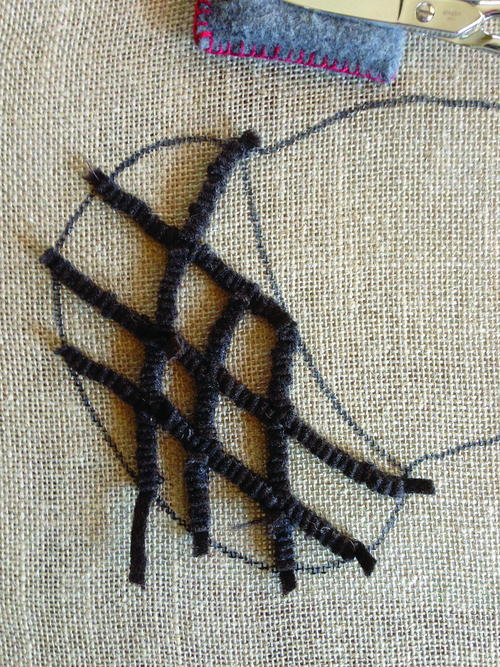
Hook the crosses in the top first using strips of wool or yarn. Then use directional hooking as you fill in the acorn and the cap.
-
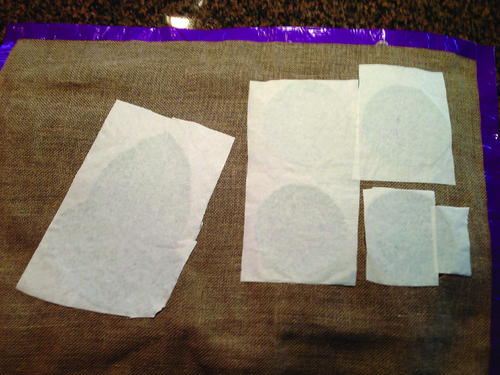
Hook matching circular trivets if you have enough wool. When hooking a circle larger than a baseball, draw a smaller circle in the center and hook in it. This will help maintain the shape.
-
Cover the back with iron-on adhesive.
-
Cover the adhesive with felt or other material.
-
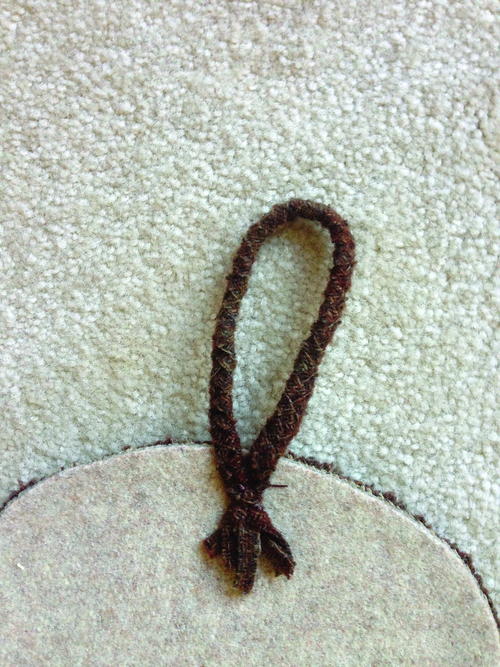
Braid leftover yarn or wool to create a hanger. Attach the hanger to the back of the piece.


Hooking the Trivet
You can hook this clever design with wool yarn. Gather your colors of yarn together so that you have them nearby. Now you are ready to start the hooking. If you are hooking with yarn, be sure that the yarn is heavy enough to hook well. Rug weight yarn works well, or try using 2 or 3 or 4 strands of lighter weight wool bundled together as one strand. Begin by hooking the crosshatch lines in the top of the acorn. Use a dark color of yarn or wool here. Because this mat will be used as a trivet, it is okay to cross over your wool in the back when doing these lines.
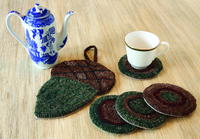
Fill in the diamond shapes with your dyed chestnut yarn or wool. Begin your loops next to the dark outline, hook up to the corner, turn, and hook down the next side, row by row, working your way in until you are into the center. You are not only filling a space, but you are also leading the viewer’s eye around the piece with the direction of your loops. Now hook the acorn bottom with the evergreen yarn or wool. Pay attention to the direction of your loops: start on the outside and work your way in. I hooked several rows on one side and then switched to the other side to keep the flow of the loops even. Continue on until the acorn is complete. I had a good bit of linen left over and plenty of matching wool, so I hooked coasters to match the trivet. Trace a can or cup for a circle, start hooking on the outside, and work in, loop by loop. The red in the coasters was the two pockets of the skirt, dyed in a wee bit of red.
Finishing the Mat
I finished these trivets a little differently than usual, as whipping was not needed. Cover your kitchen counter (a good height for steaming) with several layers of old towels. Give the trivet and coasters a good pressing by laying a damp wash cloth over the back of the hooking. Press with a hot iron on the wool setting, allowing the steam to set the loops. Repeat on the front and allow the hooking to dry overnight. Attach an adhesive to the back of the trivet. I used a two-sided, iron-on adhesive, such as Wonder Under™, and following manufacturer’s directions I ironed the adhesive to the back of the hooked piece. Then I used some old felted wool and adhered that to finish off the piece (See #10 above.) You could use crafter’s felt or heavyweight wool. Carefully cut out your hooked trivet and coasters. Keep your loops facing up as you cut. Last of all, I ran a bead of Fray Check™ all around the piece. Braid three strands of yarn or strips of wool together and then tacked them to the back of the trivet to create a nice hanger. This quick and delightful project is a great gift for a special friend—and wouldn’t it be a lovely way of sharing our craft?
-
Acorn Trivet Rug Hooking Pattern