Slow Cooker Dyeing 101
Recycle, resist, relax, results

Recently I learned that used clothing is becoming one of our biggest landfill issues. It is so easy to acquire items and also easy to throw them away—but where is away? Whenever possible we should recycle, not only for us, but for future generations.
As rug hookers, we are always on the hunt for that perfect piece of wool to add beauty to our hand-hooked rugs. It is easy to click a few keys and have a package of brand-new wool at the doorstep. But have you ever shopped at a thrift shop or secondhand store for wool? Recycled wool gives us an opportunity to have something different in our rugs—a one-of-a-kind wool to make our rug different from all those other rugs. So let’s discuss what to look for when you go hunting at your local thrift shop.
First of all, look for a dye pot, one that you will use only for dyeing. For the dye method I will tell you about, you need a 3 1⁄2 quart slow cooker. These are easy to find in secondhand stores, thrift shops, local yard sales, and church rummage sales. The slow cooker I currently use was purchased five years ago for under $5.00. It still works fine.
Once you have a slow cooker, it is time to hunt for wool. I look for 100% wool. Most recycled garments still have their content labels. Go to the skirts first and check the plus sizes—you will get a lot more wool for your money there. Pleated skirts have a lot of wool, too. Stay away from worsted wools, as they fail sooner in rugs due to the method in which they are woven.
Consider the weight of the wool. If the skirt has a lining, pull it up from the hemline and look through the wool into the light for a sense of the weave and how tightly it was woven. Feel the skirt; with practice you will be able to identify how thick it is, how soft, or coarse. Look at men’s suits, but remember that they are time-consuming to deconstruct and they often have linings that are fused in and difficult to remove. (I’ve made a few exceptions to this rule; once I found a men’s camel-hair suit coat that was too large and lovely to leave behind.)
Then comes deconstruction. Skirts are easy to take apart; you will need a seam ripper and a good pair of scissors. Begin by cutting the waistband free from the skirt. Then open all pleats or darts that are in the skirt. Then the hem can be freed, and you are done. (Some skirt linings are lovely to save for other crafts.) Now you can lay the skirt out to approximate how much wool there is. I keep a half yard of as-is wool around to use as a measure. Depending on the size of the skirt and number of pleats, you can expect a half-yard to two full yards from a skirt.
It is a good idea to clip into the wool at the top (a 2" clip), so that once the wool is dyed you will still know the correct direction to tear it. When possible, tear your wool with the warp or selvage threads, which is the direction that the weave is the strongest.
Now it is time to prepare the wool for dyeing. First of all is a soak. Put your wool, which is ripped into half-yard pieces, into a bucket. Fill the bucket with hot water and several drops of Synthrapol (a wool-wetting agent available through PRO Chem), or several drops of Jet Dry. This will open the inner cuticle of the wool so that the dye is accepted throughout the wool. Allow the wool to soak for several hours or even overnight. (The best soak bucket can be made from a recycled plastic cat litter bucket, the type with a snap-on lid—one more way that we’re going green!) Normally I prepare and soak the wool the evening before I dye.
Now the wool is thoroughly wet and ready for the slow cooker. First let’s put the kettle on to boil water for our dye. Then fill the slow cooker up a little under half full with cool water. Put the slow cooker on the tray to catch drips.
Let’s talk about the dye we are using. PRO Chem 560 Chestnut is a blend of the three primary colors: red, blue, and yellow (although the amounts of each individual dye is unknown to us). Most browns are made by combining the primary colors—that’s how we get mud. Each of the three dyes has a different grab rate (grab rate is the temperature and order of when that color penetrates the wool fibers). Yellow is normally the last color to grab, requiring the hottest water. Another important point about 560 Chestnut is that it must be completely dissolved with boiling water—not hot water, boiling water.
Measure out required amount of dry dye and place into your measuring cup. Here’s a great tip: slightly wet your measuring cup so the dry dye particles grab into the cup right away and there will be no dye drift. Then mix one cup boiling water into the dye and stir using a small whisk, making sure to break down all dye particles. Then pour the mixed dye solution into the slow cooker. Your water and dye solution should be slightly warm, and the water level should be just above halfway. You need headspace for your wool so the water won’t overflow.
Remove the wool from the soak pail and place it in a “resist” pan, a vessel where you can arrange the wool in preparation for dyeing. My pan can accommodate one-half yard of wool. Arrange the wool in a lot of little peaks and valleys. These will “resist” the dye; it is hard for the water and dye to get into all those nooks and crannies, and, as a result your wool will be lovely, with lots of variations in the color. Once you have your wool arranged in a pleasing manner, it’s time to get it into the slow cooker. The trick to this is getting it in there without disturbing all those lovely peaks and valleys. Spread your fingers as wide as possible and grab the wool from the inner lip of the resist pan; gingerly lift it up and place it into the slow cooker. Using your potato masher, gently push the wool down to the bottom. Do this in several places, working in a clockwise direction. Only push down so the whole piece of wool is immersed under the dye water. Check your water level: your slow cooker needs at least 3" inches of headspace. Add a small amount of water, if needed.
Now comes the difficult part: place the lid on top, set slow cooker on high, and WALK AWAY. Set it and forget it. You can’t uncover the slow cooker for at least one hour. It takes a good while to get the temperature high enough to set the dyes.
After 1 1⁄2 hours, it’s time to add the mordant. A mordant makes the dye grab and set. Mix 1 heaping teaspoon of citric acid into 1 cup warm water, stir to dissolve. Or use 1 cup of vinegar. Use your dyeing tweezers or a long wooden spoon handle, slide it down the inside of the slow cooker, and nudge the wool away from the wall. Pour half the mordant on one side (not directly onto the wool, but into the water). Repeat on the other side. Once again, mash the wool down with a potato masher, replace the lid, and set your timer for one hour. Walk away.
After an hour, pour the water and wool into the sink. Please be careful: remember you are working with hot water and hot wool. Allow the wool to cool, rinse it thoroughly, and dry it in the dryer. Enjoy your hand-dyed, beautiful one-of-a-kind wool.
The samples on the facing page were dyed using this slow cooker method. I used two recycled skirts and 1⁄2-yard of natural wool from Woolrich. The two recycled skirts were dyed in a solution of 2⁄32 Pro Chem Chestnut 560 to 1 cup boiling water. The Woolrich natural wool yardage was overdyed with only 1⁄32 Chestnut 560 to 1 cup boiling water. You only need a small amount of dye to make these light and lovely wools.
Create a rainbow of lovely hand-dyed woolens to add to your stash with this failsafe method.
Materials List
- Slow Cooker: 3 1⁄2-quart size
- Cafeteria tray (optional)
- Soaking bucket
- PRO Chem 560 Chestnut dye
- Dye spoon with 1⁄ 32 measurement
- 2-cup glass measuring cup
- Recycled potato masher
- Long tweezers or long wooden spoon
- Resist pan/Microwave splatter lid
- Jar with salt, to clean dye spoon
- Synthrapol or Jet Dry (wetting agent)
- Citric acid crystals or vinegar (setting agent or mordant)
Slow Cooker Dyeing 101
Let's get started!
-
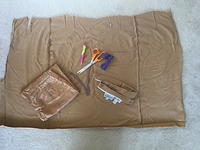
Deconstructing the upcycled clothing, mining the wool!
-
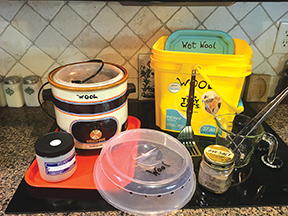
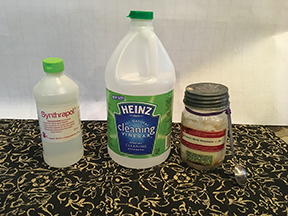
Supplies needed to overdye your thrift store treasures.
-
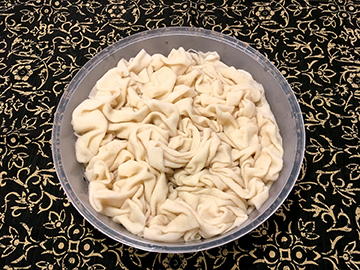
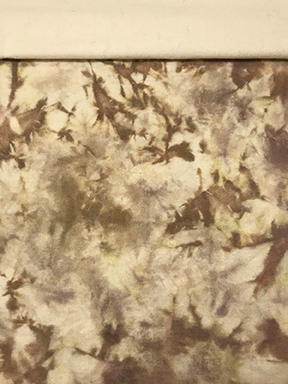
Here is my crumpled up wool in resist pan
-
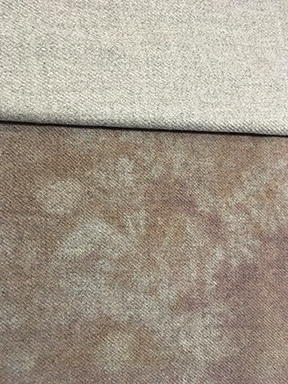
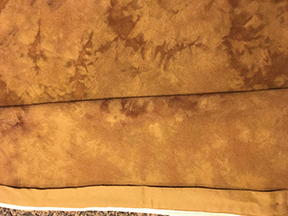
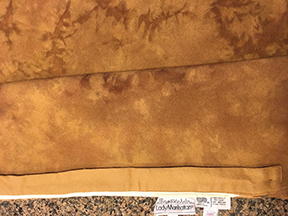
Wool samples, before and after dyeing.
Nancy's Dyeing Tips
• Label ALL dye equipment with a permanent marker. Once something is used for dyeing it is no longer food safe.
• I use a 2-cup glass measuring cup and I mark the 1-cup and the 2-cup lines with nail polish.
• Wet the bottom of a measuring cup before adding dry dye to prevent dye drift.
• A small cafeteria tray is a great catch-all for under your slow cooker.
• Nick the top of your wool before dyeing to mark the selvedge direction.
• Cleaning vinegar has a stronger acidity (6%) as compared to regular vinegar (5%). It is a better choice for dyeing.
• Recycle, relax, dye with a resist.
Nancy Zeppelin Parcels lives in Rustburg, Virginia. She is a McGown Certified Instructor. She teaches from her home and loves to travel to rug camps and retreats. Several of her rugs have been featured in Celebration of Hand-Hooked Rugs. Dyeing recycled wools and the thrill of the hunt are her passions, and she loves to make new dyers feel at ease around the dye pot.
Read NextFrom My Dye Pot: You Only Live Once