
Stars, Stripes & Sparkles
A New Year's resolution rug with fireworks and flags
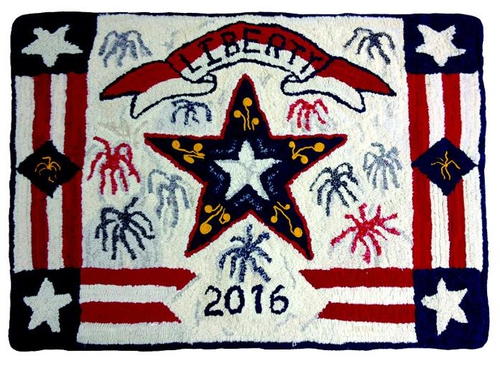
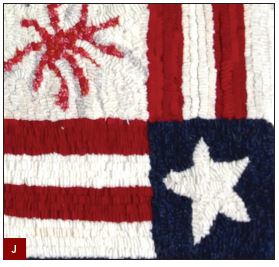
Stars, Stripes, and Sparkles, 36" x 24", #7- and 8-cut wool on linen. Designed and hooked by Staci Shuck, Huntingdon, Pennsylvania, 2016.
As I waited for the ball to drop New Year’s Eve 2015, I scrolled through my social media to wish friends health and happiness in 2016. I am not a resolution maker, but as my friends posted their 2016 resolutions, I decided 2016 would be different. While others vowed to lose weight, exercise more, and pay off debt, I vowed to complete projects. I wrote: “I, Staci Shuck, vow to complete one hooked 'project of the year,' using only materials and tools from my stash.”
There. I had done it. It was public, and I was now bound to this resolution. I planned to design and create a piece that represented the events our family experienced during 2016. I already document family events through journals and scrapbooks, so it should be relatively easy to create a 2016 Memory Rug.
Fast forward to September of 2016. I decided it was time to organize a plan and get rolling with this resolution. When sorting through photos of the year’s activities, I ran across an old photo of our former storefront adorned from top to bottom in patriotic buntings, banners, and flags. Although it was black-and-white, the colors and theme of this 1905 photo were clearly evident—it was taken during the Memorial Day Old Home Week celebration held in our community, Huntingdon, Pennsylvania. I also found a photo of a parade. Inspired by the photos, I decided to hook a patriotic rug filled with red, white, and blue!
THE OFFICIAL RULES OF THE RESOLUTION
-
Use only materials and tools from my stash.
-
Incorporate at least one “mixed media” technique.
-
Seek input from my family.
-
Complete the project by December 31, 2016.
-
Create a project that reflects the events of 2016.
-
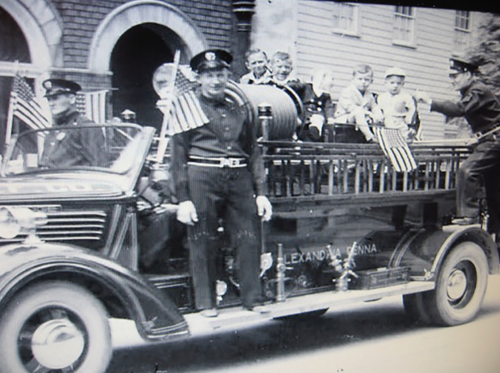
1940-era parade photo featuring my father and his brothers riding on the back of the firetruck in Alexandria, Pennsylvania.
MATERIALS USED FROM MY STASH
-
Backing: primitive linen remnant
-
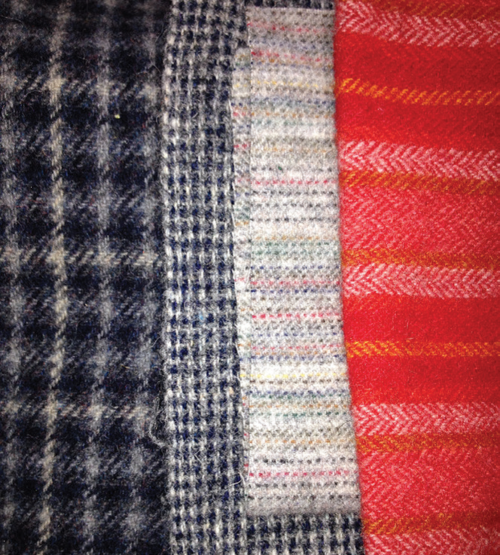
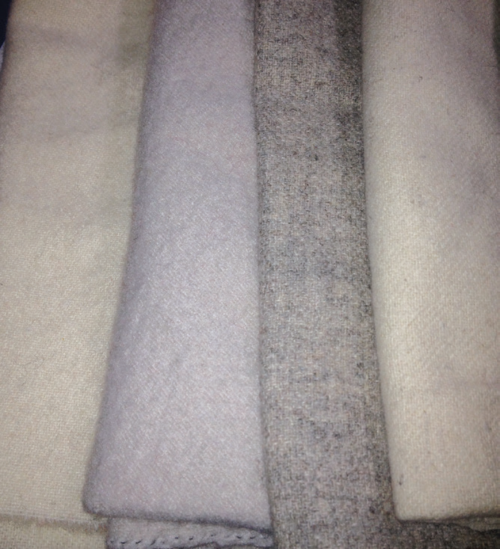
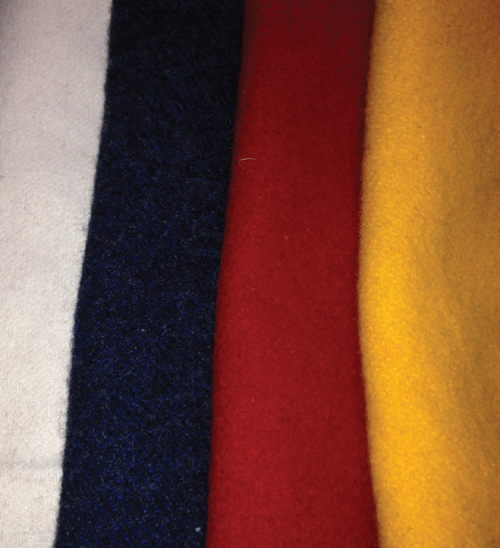
Assorted wools in red, blue, white, cream, gray; #7- and 8-cut strips
-
Sparkly fabrics, ribbons, and trims for fireworks
-
Select textures for fireworks
-
1⁄4" 100% cotton cording for binding
-
100% cotton heavy quilting thread
-
Curved quilting needles in assorted sizes
-
Large-eye yarn needle to whipstitch the binding
HOW I HOOKED STARS, STRIPES, AND SPARKLES
-
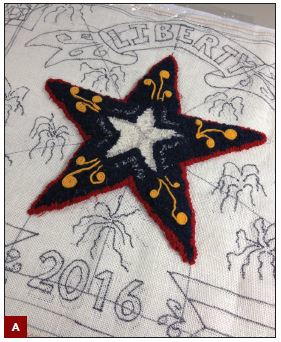
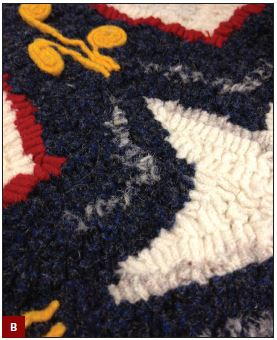
Center star: I began with the center white star, outlining first, and then filling in. Then I outlined the white star with 2 rows of #8-cut navy strips. Next, I hooked v-shaped accents in the valleys of the star, using a navy and white textured wool. Steam this portion before moving on to the standing wool accents. (A and B)
-
Standing wool instructions: I love to make standing wool coils or quillies and find it is a great way to add dimension to a project. There is something soothing about coiling strips of wool and stitching them together for a practical purpose. You’ll need wool strips (I used #8-cut strips), strong thread, and curved quilting needles. Long quilter’s pins are handy to hold the coil in place for sewing.
• Tightly coil the strip, keeping edges even on at least one side. Wind the coil to match size as shown on your pattern, leaving some of the wool strip for a tail. Pin the coil in place, and trim the tail to the desired length.
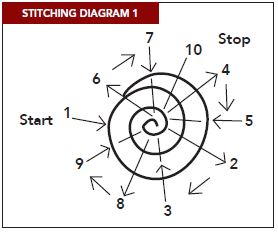
• Thread a small, curved quilting needle with knotted double thread. Secure the coil by stitching following Stitching Diagram 1. Insert needle at step 1, out at step 2, and so on, until reaching step 10. Do not cut thread.
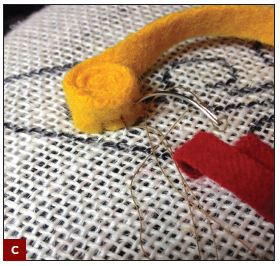
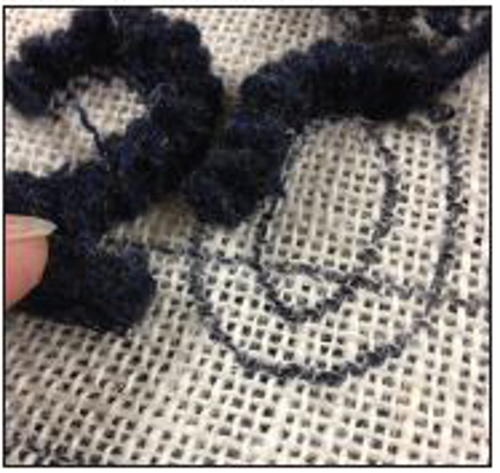
• Place the coil on foundation fabric and stitch it in place with a whip stitch. Stitches should be close to bottom of coil and should not be visible on the top surface. Continue from coil to the tail. Secure with a knot in the wool at the end of tail strip. (C)
• Stitching on back of foundation fabric may be scattered and uneven. Be sure to check that all the edges of the coil and tail have been securely stitched to foundation fabric. Repeat this process with each coiled piece until all are securely attached.
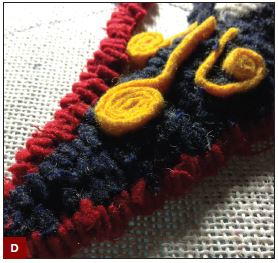
• Hook around each piece. Trim the surface of coil and tail to the desired height. Allow the standing wool coils/tails to be slightly higher than the hooked surface so that they don’t get lost among the loops. Steam the entire star. (D)
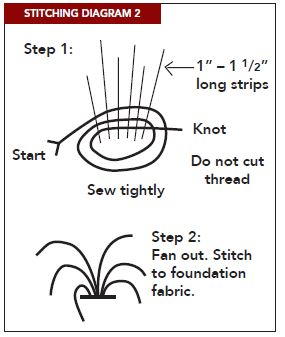
• Fireworks on side panels are constructed with same standing wool. Follow Stitching Diagram 2. Finish the blue squares by outlining the square and hooking around the standing wool fireworks. Steam each square before moving on.
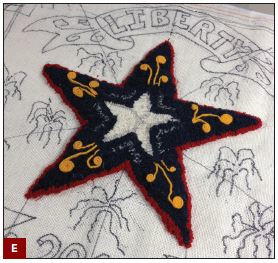
• After all the standing wool elements have been attached, outline the large star in blue, followed by a row of red, and then fill in any remaining spots with blue or your desired color. Steam large star. (E)
NOTE: There are several places where you might want to add additional standing wool coils and swirls on the banner and bottom of the pattern. Be creative. -
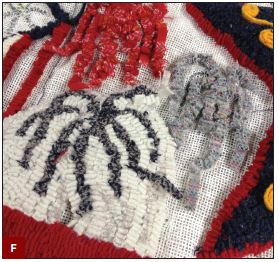
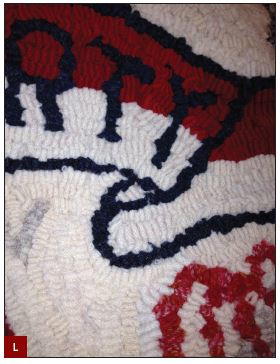
Fireworks: This was my first attempt hooking fireworks, and initially I was not impressed with the spider-like designs I had created. Hooking the background around them made all the difference and I am completely in love! I imagined using sari ribbon, glitter trim, and filament yarns, but my stash was limited in the “sparkle” department, so I experimented with textured wool remnants in blue, gray, and red. I added “streamers” in light gray around the background of the fireworks. Like letters and numbers, fireworks are just lines with curves—hook them in the direction they erupt/explode, from the center out. I will add sparkles to my next version of this piece. (Stitching Diagrams 1 and 2, above)
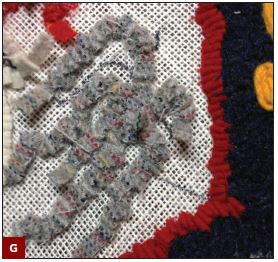
• Hook each firework starting from the center and working out using various textured wools. It is
not necessary to hook each line shown on the pattern. Be sure to leave ample room to hook white background wool and streamers in light gray wool between the branches of the fireworks. (F and G)
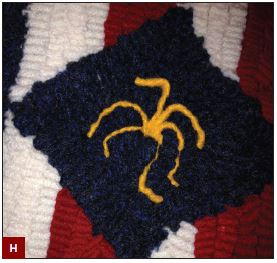
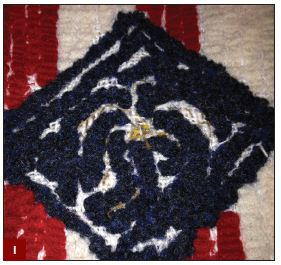
• At this point, I completed hooking the background area closest to each firework, but I did not complete the entire background. (H and I)
• Steam each section of fireworks. If using sparkly fibers and ribbons, check the fiber content for heat sensitivity and flammability. Avoid a fiber disaster. -
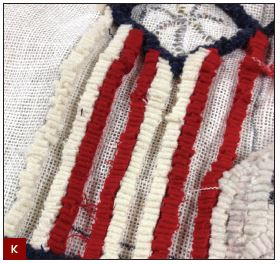
Stars and stripes: Next, hook the corner stars and stripes banners. I first outlined the stars in each corner, then I outlined the blue square corners in navy. I continued outlining the white and red stripes extending from each corner square. I filled in each white star and the blue squares, and steamed each square before moving on. Before filling in the stripes, make sure the outlined stripes match at the same points on the blue squares with standing wool firework centers. If matching stripes aren’t important to you, that’s fine too! The same holds true for the banners across the bottom. Finish by steaming each striped section. (J and K)
-
Title banner: I first outlined the entire banner in blue wool. I then divided the banner in half lengthwise by drawing a line from end to end. I hooked the letters first and would have added the standing wool swirls next but was limited on my supply of yellow wool. Next, fill in the background of the banner. I hooked around the letters, then lengthwise rows from one edge to the other with red wool on top half and white on bottom half. Steam. This element was the most challenging part of the design for me. There were so many possibilities it was difficult to settle on one plan. I think I’m thankful for a limited stash and the rules of my resolution—otherwise I may not have been able to finish the piece by the deadline!
-
Background: Begin filling in background color. I chose whites, very light gray, and off white for background, again using colors available in my stash. I completed the background in sections, reminding myself to keep the hooking loose and steaming each section before moving on to the next.
-
Finishing
• Steaming: As you can tell, I’m a steamer. I steam rugs as I go because I hook tight and snug, so steaming as I go is crucial. Steaming helps to “relax” each hooked area and ease the wool into the foundation fabric to create a smooth, flat appearance. Steaming also felts the wool fibers, lightly securing them in place. Remember to not apply pressure as you steam; instead, allow the iron to rest for 5–10 seconds in one area while the wool heats and felts to itself.
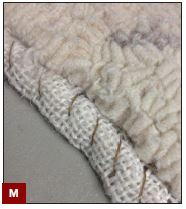
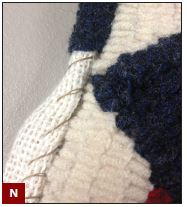
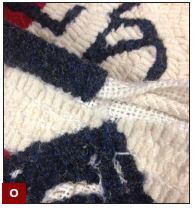
• Binding: Binding is the least favorite step for many hookers. I encourage you to try many different methods to find one that works best for you. My favorite is whipstitching with wool strips over a cotton cord that has been covered and sewn to the foundation fabric. Although it adds a few steps to the process, it reinforces the edges, which are often the first to show signs of wear. I often use this method to repair vintage rugs when foundation fabric has worn and reinforcement is required. The cording I use is approximately 1⁄4" thick, 100% cotton, and can be purchased by the yard at almost any fabric store. Wrap the foundation fabric around the cording and, using a knotted single thread and curved quilting needle, baste the cording to the foundation fabric as shown. Complete by whipstitching over the cording. Be sure to overlap strips to cover and secure the cording completely. (M, N, and O) -
I’m not sure how many of my friends completed their resolutions, but I’m quite happy with mine, and I’ve already started planning for 2018. I hope you’ll consider making rug hooking a part of your annual resolutions and that you’ll create your own hooked project of the year soon.
This project is dedicated to my family with many thanks for their help sharing memories and ideas, providing advice and suggestions, proofreading and editing, and supporting me in my creative journey.
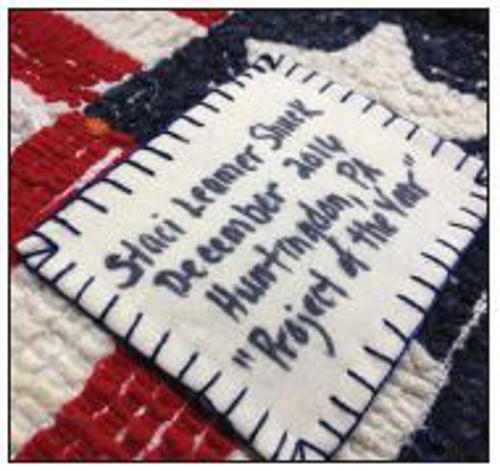
SIGN YOUR HOOKINGS
Be sure to identify your work. I’m always thrilled to find a beautiful hooked piece, and even more thrilled when that piece is signed or dated. Leave your mark, signature, or, at the very least, your name. Painters and other artists sign their work and so should we. Whether it’s on the binding, hooked into the piece, embroidered, tagged, or on an added name plate, it should be the final step of every project.
HOOKING LETTERS AND NUMBERS
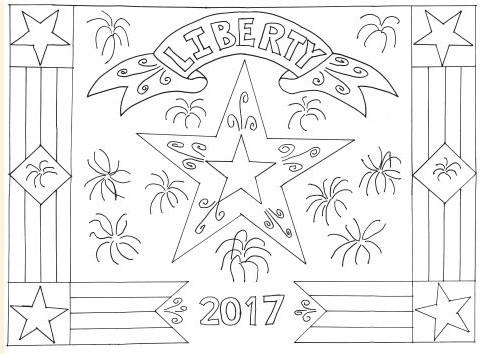
Many are reluctant to use letters and numbers in their projects. I remember that fear and would like to encourage you to experiment and play. Learning to write with wool is similar to writing with a crayon or pencil. It’s really that easy as long as you remember to hook the same as you write. Replace the crayon or pencil with your hook and wool. Move in the same direction with each letter or number that you would if you were writing. Start in the same place and end in the same place, whether you are writing cursive or printing. I hooked the letters and numbers with a single row of #8-cut wool. This was perfect to fill in the block letters/numbers. I positioned my wool loops in the center of each letter and number. Note: 2016 is the year in the photo. I put in 2017 on the pattern. Please adjust accordingly to suit your project. Hook the numbers and fill in around each by outlining. Steam.
Stars, Stripes, and Sparkles, © 2016, Staci Shuck. Enlarge by 425% for a finished rug of 36" x 24". For personal use only.
Staci Shuck is a retired home economics teacher and owner of Vintage, Scrap & Stitch, LLC, offering vintage and current textiles, notions, tools, and memorabilia of the sewing, textile, and fiber arts industry. She can be found teaching, demonstrating, and exhibiting at fiber festivals, fairs, and antique shows throughout the year. Visit her website https://vintagscrapstitch.com.
Read NextEwe Who

